Tools needed Herramientas necesarias
- Screwdriver
- Zip ties (for mounting)
- Destornillador
- Bridas (para montar)
Installation steps Pasos de instalación
1. Scan the device barcode or type it in manually.
1. Escanee el código de barras del dispositivo o ingréselo manualmente.
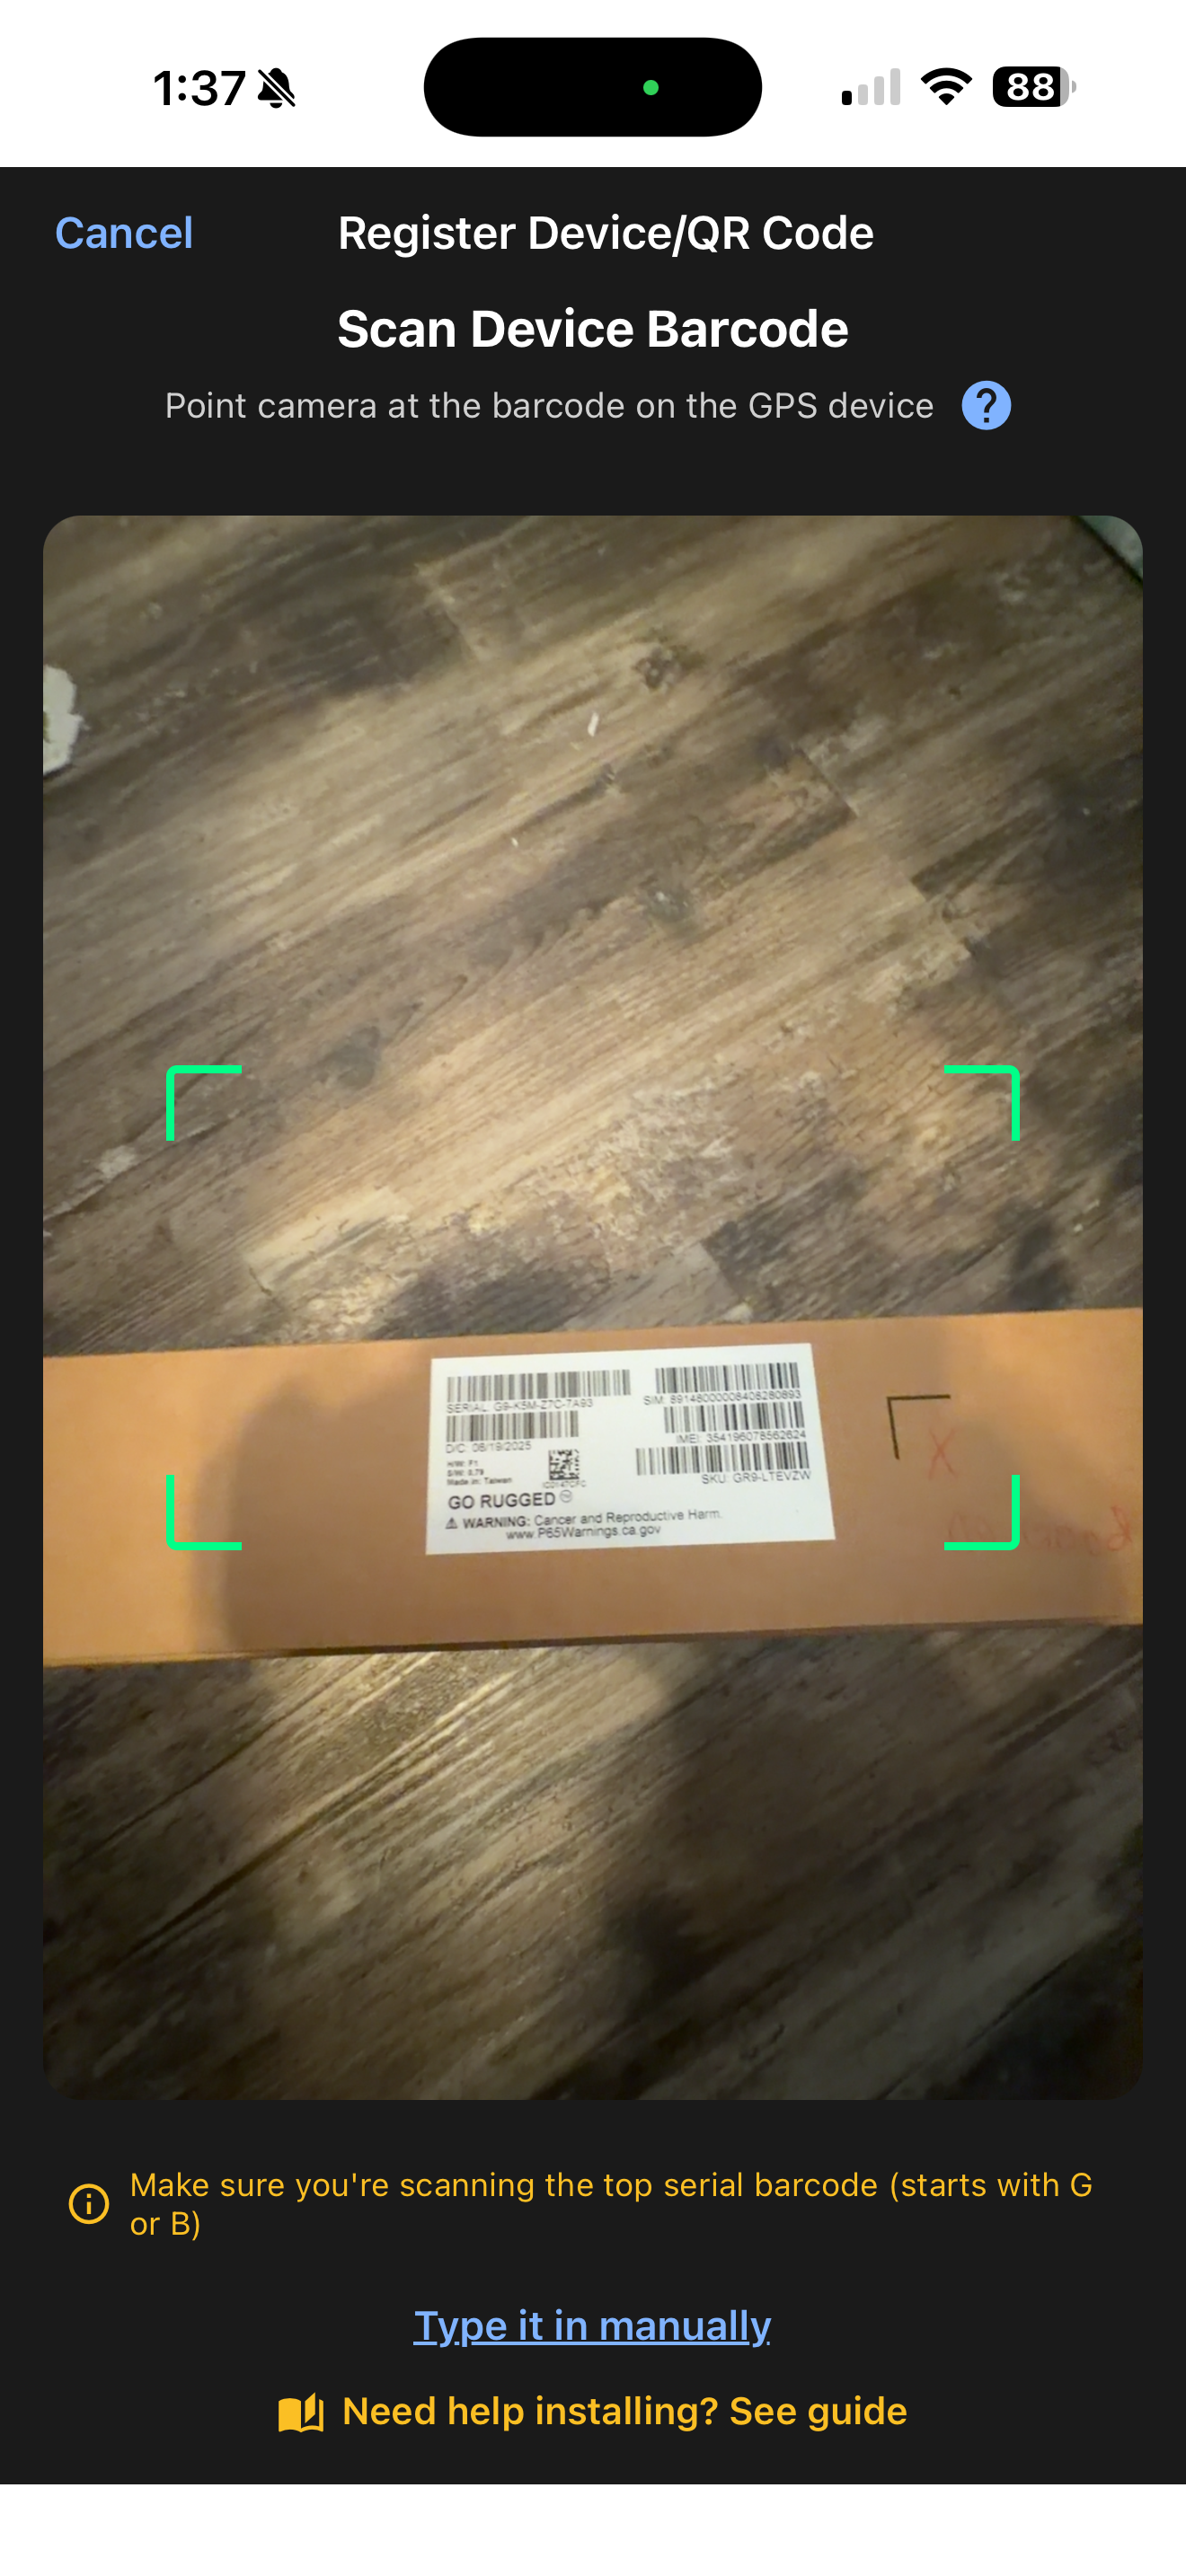
⚠ If the device is not synced to your account you will see a "Device not in your account" message — contact support to get it synced.
⚠ Si el dispositivo no está sincronizado con su cuenta verá el mensaje "Dispositivo no está en su cuenta" — comuníquese con soporte para sincronizarlo.
2. Fill in equipment details. The following are required: Equipment Name, Equipment Type, and Current Engine Hours.
2. Complete los detalles del equipo. Los siguientes son obligatorios: Nombre del equipo, Tipo de equipo y Horas actuales del motor.
3. Optional: Odometer reading, Make, Model, Year, VIN, Labels, and Notes.
3. Opcional: Lectura del odómetro, Marca, Modelo, Año, VIN, Etiquetas y Notas.
4. Press Update to save changes.
4. Presione Actualizar para guardar los cambios.
💡 At the top of the page you can also assign a QR code if you have one on hand.
💡 En la parte superior de la página también puede asignar un código QR si tiene uno a la mano.
Use the J1939 harness if a J1939 port is available (except New Holland pre-2021). ⚠ Use the 3-wire harness for equipment without a J1939 port. ⚠ CAT, Perkins, and Pellenc engines also require a crossover harness (different guide).
Use el arnés J1939 si hay un puerto J1939 disponible (excepto New Holland antes de 2021). ⚠ Use el arnés de 3 cables para equipo sin puerto J1939. ⚠ Motores CAT, Perkins y Pellenc también requieren un arnés cruzado (guía diferente).
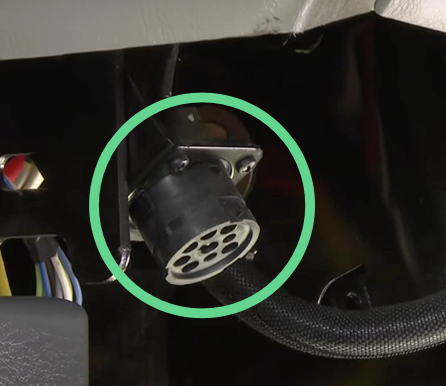
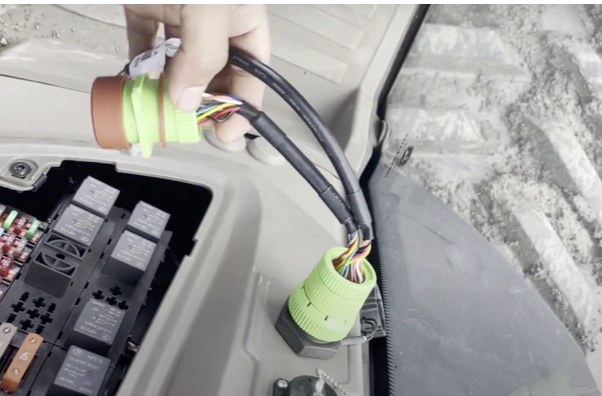
Locate the 9-pin Deutsch (J1939) port in the cab — usually near the fuse panel or under the dashboard. Plug the harness in firmly. Twist the locking collar until it clicks and is fully secured. ⚠ A partial connection will cause wrong ignition data ("always on" issues).
Localice el puerto Deutsch (J1939) de 9 pines en la cabina — generalmente cerca del panel de fusibles o debajo del tablero. Conecte el arnés firmemente. Gire el collar de bloqueo hasta que haga clic y esté completamente asegurado. ⚠ Una conexión parcial causará datos de encendido incorrectos (problemas de "siempre encendido").
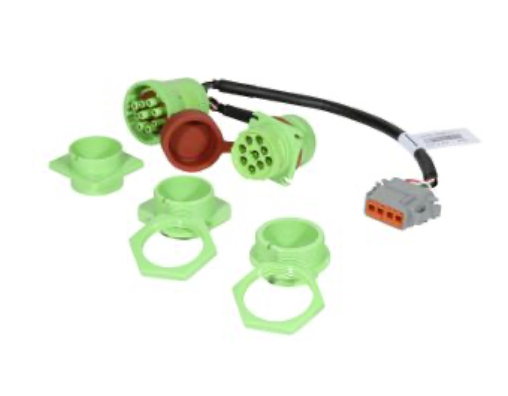
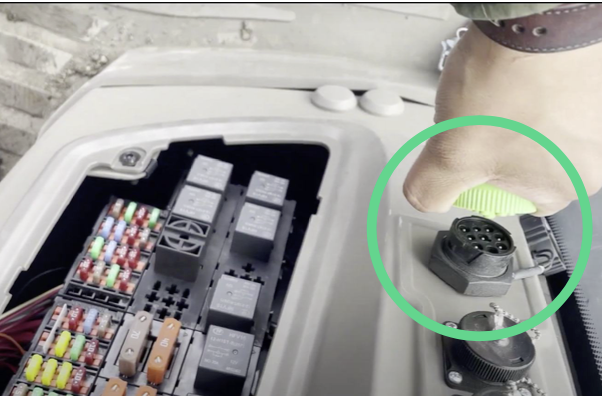
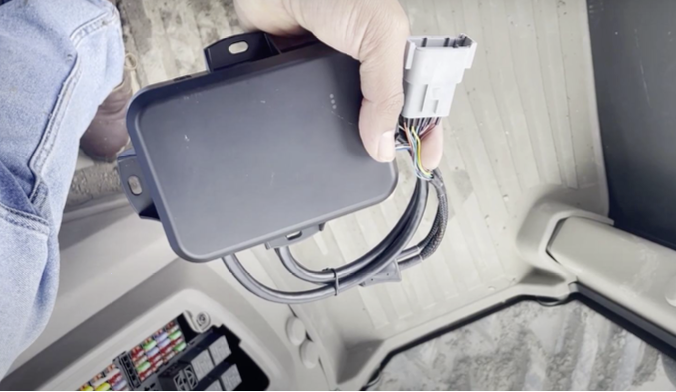
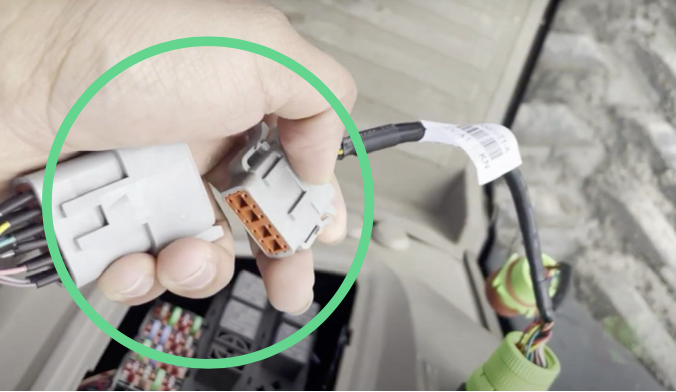
Connect the harness to the GPS device. Push firmly until it clicks. The connector goes in one way only.
Conecte el arnés al dispositivo GPS. Empuje firmemente hasta que haga clic. El conector entra solo de una manera.
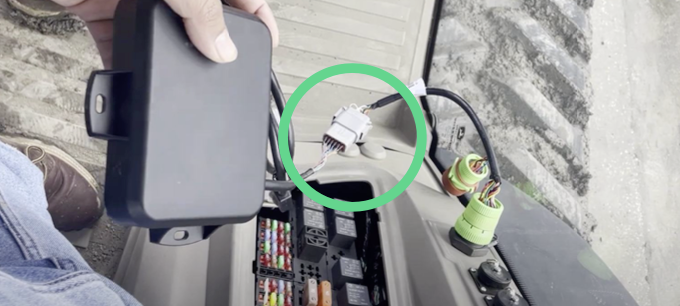
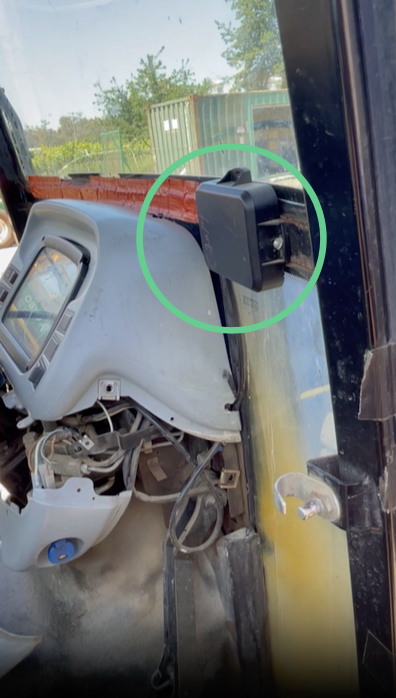
Secure the device with screws or zip ties. • Keep it dry and out of direct sunlight. • Don't pinch the cables.
Asegure el dispositivo con tornillos o bridas. • Manténgalo seco y alejado de la luz solar directa. • No pellizque los cables.
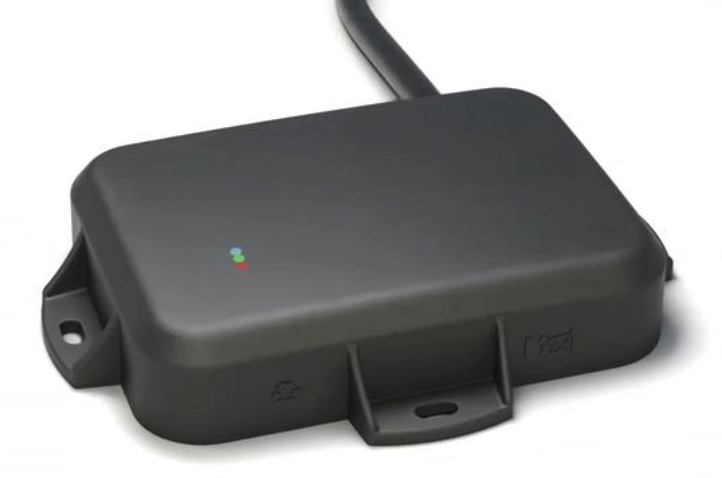
Start the equipment and verify the LED pattern. Allow up to 15 minutes for solid LEDs. ⚠ Drive the equipment outside the workshop to prevent the roof from interfering with the GPS signal. 🔴 Red blinking — firmware update pending 🔴 Red solid — firmware downloaded 🔵 Blue blinking — GPS on, not connected 🔵 Blue solid — GPS connected ✅ 🟢 Green blinking — cellular on, not connected 🟢 Green solid — cellular connected ✅
Arranque el equipo y verifique el patrón de LED. Espere hasta 15 minutos para LEDs sólidos. ⚠ Conduzca el equipo fuera del taller para evitar que el techo interfiera con la señal GPS. 🔴 Rojo parpadeando — actualización de firmware pendiente 🔴 Rojo sólido — firmware descargado 🔵 Azul parpadeando — GPS encendido, no conectado 🔵 Azul sólido — GPS conectado ✅ 🟢 Verde parpadeando — celular encendido, no conectado 🟢 Verde sólido — celular conectado ✅
LED Quick Reference Referencia rápida de LEDs
| LEDLED | BlinkingParpadeando | SolidSólido |
|---|---|---|
| 🔴 RedRojo | Firmware updatingActualizando firmware | Firmware downloaded ✓Firmware descargado ✓ |
| 🔵 BlueAzul | GPS on, searchingGPS encendido, buscando | GPS connected ✓GPS conectado ✓ |
| 🟢 GreenVerde | Cellular searchingCelular buscando | Cellular connected ✓Celular conectado ✓ |
Common issues Problemas comunes
Device won't turn on El dispositivo no enciende
- Check the J1939 port connection. Ensure the J1939 connector is fully seated and the locking collar is twisted and secured. Verifique la conexión del puerto J1939. Asegúrese de que el conector J1939 esté completamente insertado y el collar de bloqueo girado y asegurado.
- Check the vehicle is running. The J1939 port is only powered when the vehicle is running or in accessory mode. Verifique que el vehículo esté encendido. El puerto J1939 solo tiene energía cuando el vehículo está encendido o en modo accesorio.
- Inspect the J1939 port. Look for bent or corroded pins inside the J1939 port on the vehicle. Inspeccione el puerto J1939. Busque pines doblados o corroídos dentro del puerto J1939 del vehículo.
- Hard reset / power cycle. Disconnect the J1939 connector, wait 30 seconds, and reconnect with the vehicle running. Reinicio forzado. Desconecte el conector J1939, espere 30 segundos y vuelva a conectar con el vehículo encendido.
- Try a different J1939 port. Some machines have multiple J1939 ports. Try an alternate port to rule out a faulty one. Pruebe otro puerto J1939. Algunas máquinas tienen varios puertos J1939. Pruebe un puerto alternativo para descartar uno defectuoso.
Vehicle has high idle or shows "always ON" El vehículo tiene ralentí alto o muestra "siempre encendido"
- Check the J1939 data connection. Ensure the connector is fully locked. A partial connection can cause incorrect ignition readings. Verifique la conexión de datos J1939. Asegúrese de que el conector esté completamente bloqueado. Una conexión parcial puede causar lecturas de encendido incorrectas.
- Verify the locking collar. The locking collar must be fully twisted. If loose, the device may read incorrect engine data. Verifique el collar de bloqueo. El collar de bloqueo debe estar completamente girado. Si está flojo, el dispositivo puede leer datos del motor incorrectos.
- Check for CAN bus conflicts. Disconnect other J1939 accessories temporarily to isolate the issue. Busque conflictos en el bus CAN. Desconecte temporalmente otros accesorios J1939 para aislar el problema.
🔵 GPS not connecting (Blue LED not solid) 🔵 GPS no conecta (LED azul no sólido)
- Check antenna orientation. The device must have a clear view of the sky. Mount on the exterior, not blocked by a metal roof or cab. Verifique la orientación de la antena. El dispositivo debe tener vista despejada del cielo. Monte en el exterior, sin bloqueo de techo metálico o cabina.
- Move outside the shop. Metal roofs block GPS. Drive at least 20 feet outside and wait up to 15 minutes. Salga del taller. Los techos metálicos bloquean el GPS. Conduzca al menos 6 metros afuera y espere hasta 15 minutos.
- Drive around the shop. Drive slowly around the shop or yard. Movement helps the GPS lock onto satellites faster. Allow up to 15 minutes. Conduzca alrededor del taller. Conduzca lentamente alrededor del taller. El movimiento ayuda al GPS a fijar satélites más rápido. Espere hasta 15 minutos.
- Allow warm-up time. After a first install or reset, GPS can take up to 15 minutes for a solid fix. Permita tiempo de calentamiento. Tras la primera instalación o un reinicio, el GPS puede tardar hasta 15 minutos en obtener señal sólida.
🟢 Cellular not connecting (Green LED not solid) 🟢 Celular no conecta (LED verde no sólido)
- Check cellular coverage. Confirm the install location has cellular coverage. No cell service = no connection. Verifique la cobertura celular. Confirme que el lugar de instalación tenga cobertura celular. Sin servicio celular no hay conexión.
- Allow warm-up time. After powering on, the cellular modem can take up to 15 minutes to connect. Permita tiempo de calentamiento. Después de encender, el módem celular puede tardar hasta 15 minutos en conectarse.
- Scan the QR code to verify. Scan the QR code on the device label to check communication status in the portal. Escanee el código QR para verificar. Escanee el código QR en la etiqueta del dispositivo para verificar el estado de comunicación en el portal.
🔴 Red LED blinking — firmware update pending 🔴 LED rojo parpadeando — actualización de firmware pendiente
- This is normal. A blinking red LED means the device is downloading the latest firmware. Expected on a first install or after a reset. Esto es normal. Un LED rojo parpadeando significa que el dispositivo está descargando el firmware más reciente. Es normal en una primera instalación o tras un reinicio.
- Wait for solid red. Once the firmware downloads, the red LED turns solid. This can take 5–15 minutes. Keep the device powered. Espere el LED rojo sólido. Cuando el firmware termina de descargarse, el LED rojo se vuelve sólido. Puede tardar 5–15 minutos. Mantenga el dispositivo encendido.
- Do not disconnect. Do not disconnect while the red LED is blinking. Interrupting a firmware update can cause issues. No desconecte. No desconecte mientras el LED rojo parpadea. Interrumpir una actualización de firmware puede causar problemas.