Tools needed Herramientas necesarias
- Screwdriver
- Zip ties (for mounting)
- Destornillador
- Bridas (para montar)
Installation steps Pasos de instalación
1. Scan the device barcode or type it in manually.
1. Escanee el código de barras del dispositivo o ingréselo manualmente.
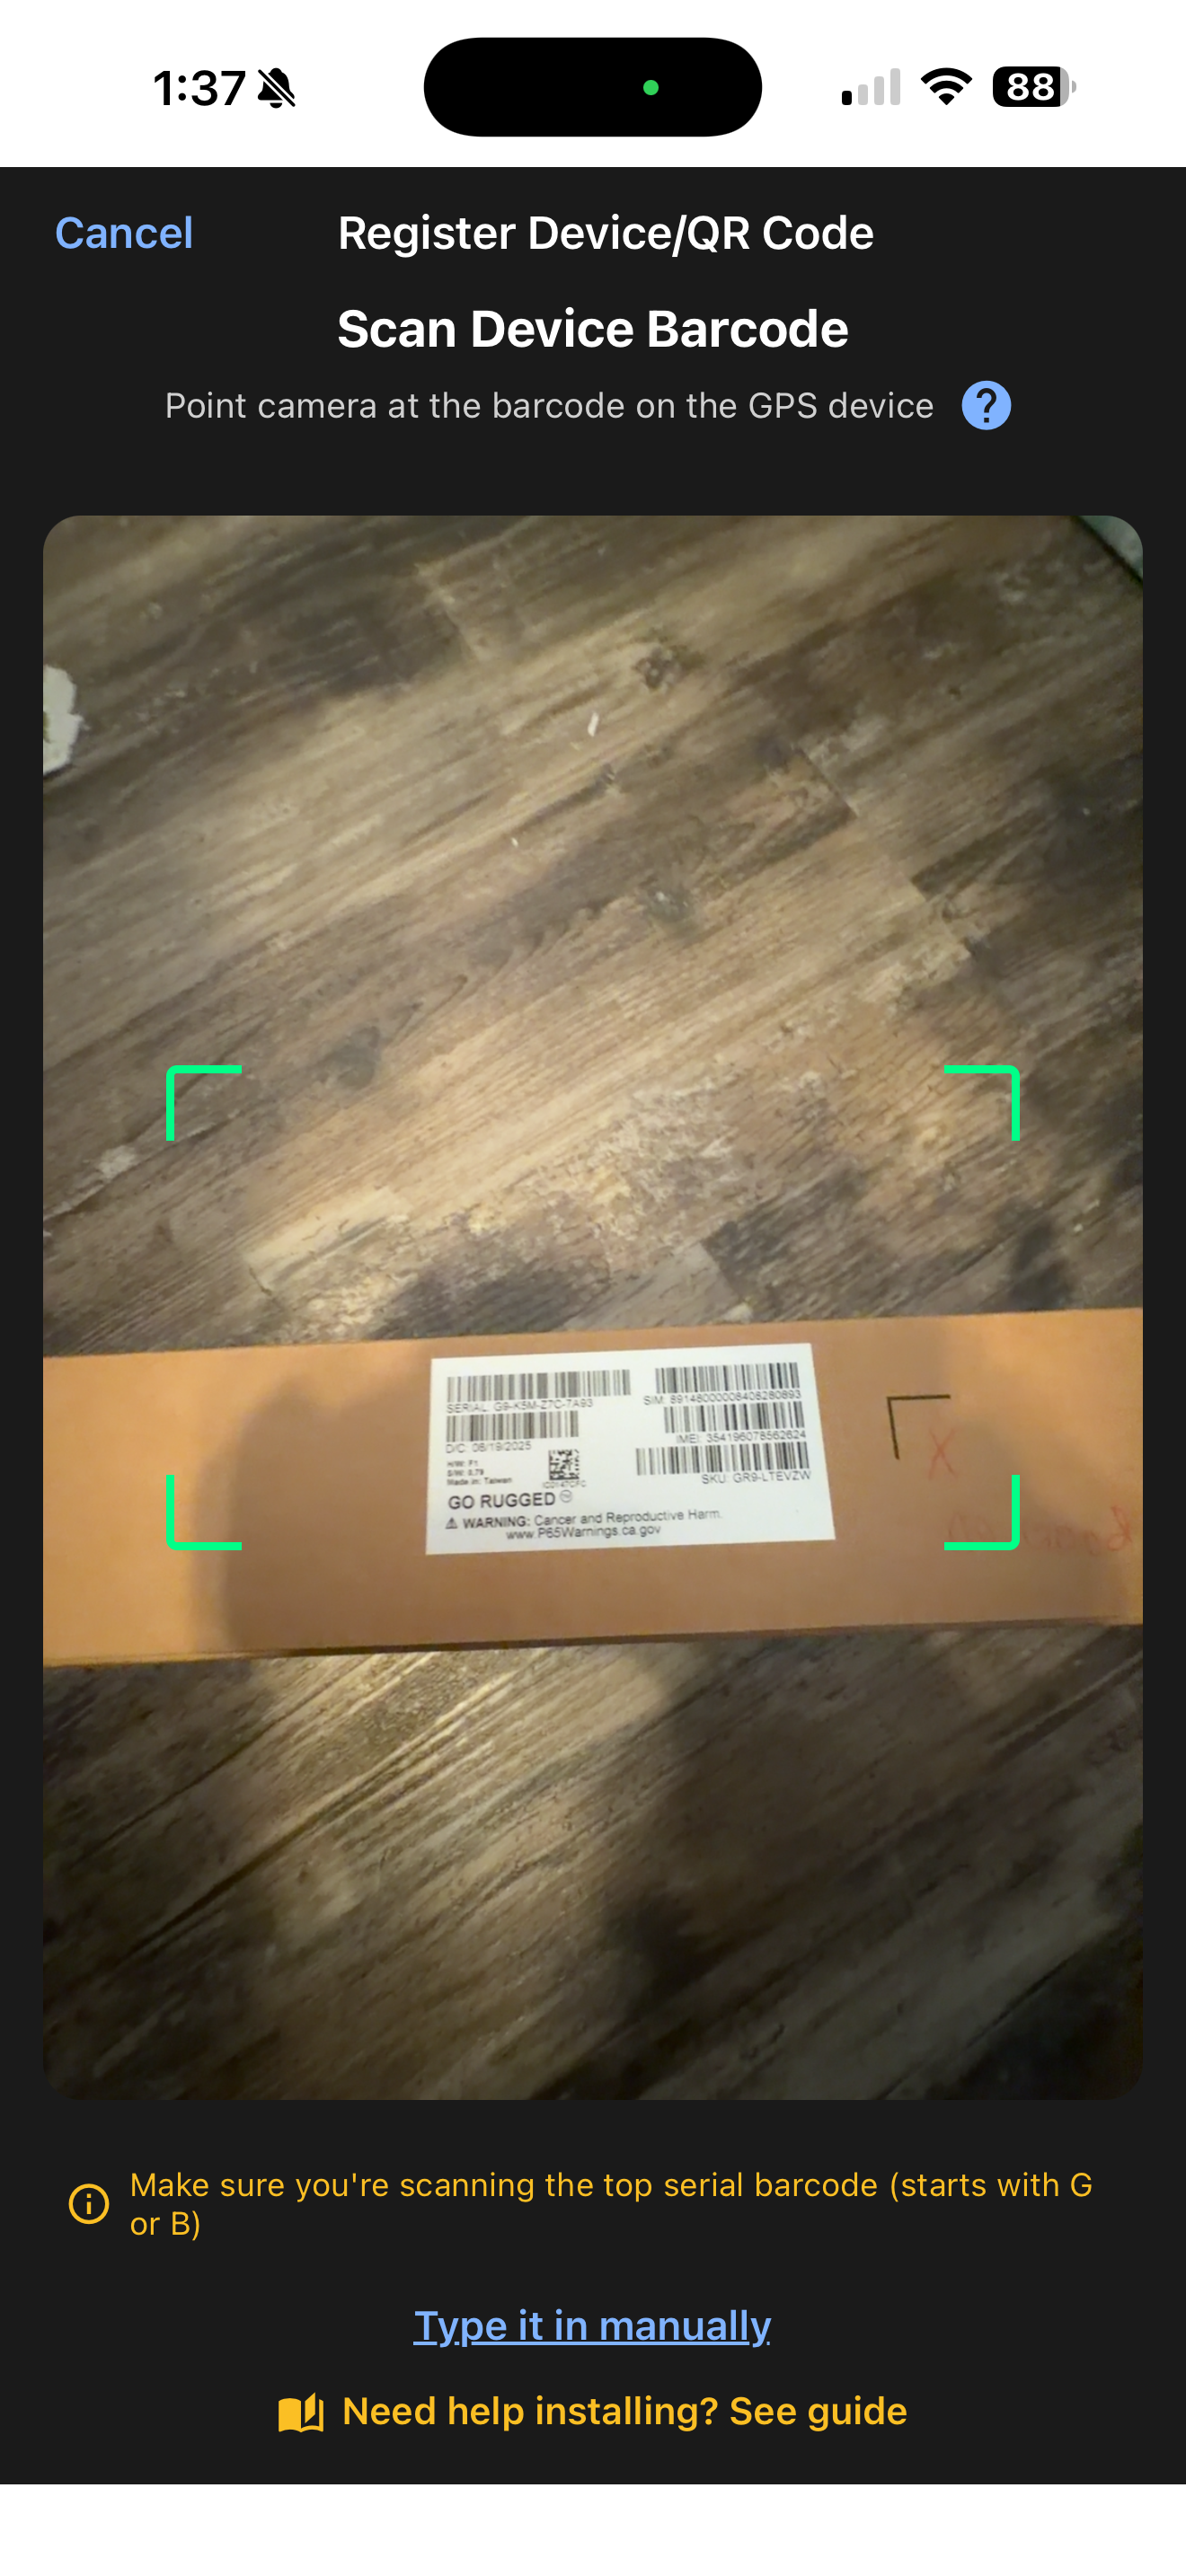
⚠ If the device is not synced to your account you will see a "Device not in your account" message — contact support to get it synced.
⚠ Si el dispositivo no está sincronizado con su cuenta verá el mensaje "Dispositivo no está en su cuenta" — comuníquese con soporte para sincronizarlo.
2. Fill in equipment details. The following are required: Equipment Name, Equipment Type, and Current Engine Hours.
2. Complete los detalles del equipo. Los siguientes son obligatorios: Nombre del equipo, Tipo de equipo y Horas actuales del motor.
3. Optional: Odometer reading, Make, Model, Year, VIN, Labels, and Notes.
3. Opcional: Lectura del odómetro, Marca, Modelo, Año, VIN, Etiquetas y Notas.
4. Press Update to save changes.
4. Presione Actualizar para guardar los cambios.
💡 At the top of the page you can also assign a QR code if you have one on hand.
💡 En la parte superior de la página también puede asignar un código QR si tiene uno a la mano.
The crossover harness is required for CAT, Perkins, and Pellenc engines. ⚠ Without the crossover, the device will not function — you may see screen glitches or the device will be unresponsive.
El arnés cruzado es requerido para motores CAT, Perkins y Pellenc. ⚠ Sin el arnés cruzado, el dispositivo no funcionará — puede ver fallas en pantalla o el dispositivo no responderá.
Locate the J1939 port and plug the crossover harness into it. Twist the locking collar fully. ⚠ Both ends of the crossover must be fully seated and locked. A loose connection causes intermittent or total failure.
Localice el puerto J1939 y conecte el arnés cruzado. Gire el collar de bloqueo completamente. ⚠ Ambos extremos del arnés cruzado deben estar completamente insertados y bloqueados. Una conexión floja causa fallas intermitentes o totales.
Plug the standard J1939 harness into the other end of the crossover. Lock the collar.
Conecte el arnés J1939 estándar al otro extremo del arnés cruzado. Bloquee el collar.
Connect the J1939 harness to the GPS device. Push firmly until it clicks.
Conecte el arnés J1939 al dispositivo GPS. Empuje firmemente hasta que haga clic.
Secure the device with screws or zip ties. • On CAT and Pellenc, ensure no metal is directly above the device (blocks GPS signal). • Don't pinch the cables.
Asegure el dispositivo con tornillos o bridas. • En CAT y Pellenc, asegúrese de que no haya metal directamente sobre el dispositivo (bloquea la señal GPS). • No pellizque los cables.
Start the equipment and verify the LED pattern. Allow up to 15 minutes for solid LEDs. ⚠ Drive the equipment outside the workshop to prevent the roof from interfering with the GPS signal. 🔴 Red blinking — firmware update pending 🔴 Red solid — firmware downloaded 🔵 Blue blinking — GPS on, not connected 🔵 Blue solid — GPS connected ✅ 🟢 Green blinking — cellular on, not connected 🟢 Green solid — cellular connected ✅
Arranque el equipo y verifique el patrón de LED. Espere hasta 15 minutos para LEDs sólidos. ⚠ Conduzca el equipo fuera del taller para evitar que el techo interfiera con la señal GPS. 🔴 Rojo parpadeando — actualización de firmware pendiente 🔴 Rojo sólido — firmware descargado 🔵 Azul parpadeando — GPS encendido, no conectado 🔵 Azul sólido — GPS conectado ✅ 🟢 Verde parpadeando — celular encendido, no conectado 🟢 Verde sólido — celular conectado ✅
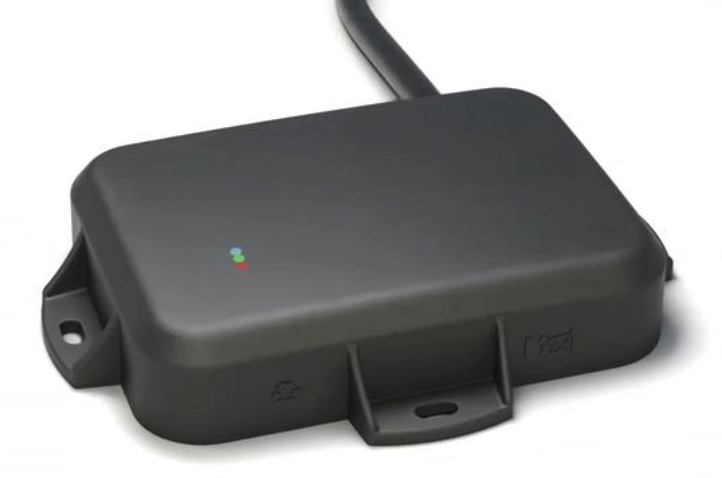
LED Quick Reference Referencia rápida de LEDs
| LEDLED | BlinkingParpadeando | SolidSólido |
|---|---|---|
| 🔴 RedRojo | Firmware updatingActualizando firmware | Firmware downloaded ✓Firmware descargado ✓ |
| 🔵 BlueAzul | GPS on, searchingGPS encendido, buscando | GPS connected ✓GPS conectado ✓ |
| 🟢 GreenVerde | Cellular searchingCelular buscando | Cellular connected ✓Celular conectado ✓ |
Common issues Problemas comunes
⚠️ Screen glitching / device not working (Pellenc, CAT, Perkins) ⚠️ Pantalla con fallas / dispositivo no funciona (Pellenc, CAT, Perkins)
- Check the crossover harness connection — do this first. The crossover harness MUST be connected on Pellenc, CAT, and Perkins machines. Without it, the device will not function and you will see screen glitches or the device will be unresponsive. Verifique la conexión del arnés cruzado — haga esto primero. El arnés cruzado DEBE estar conectado en máquinas Pellenc, CAT y Perkins. Sin él, el dispositivo no funcionará y verá fallas en pantalla o el dispositivo no responderá.
- Verify both connectors are seated. The crossover harness has two ends — one to the J1939 port, one to the device harness. Confirm BOTH are fully seated and locked. Verifique que ambos conectores estén insertados. El arnés cruzado tiene dos extremos — uno al puerto J1939 y otro al arnés del dispositivo. Confirme que AMBOS estén completamente insertados y bloqueados.
- Inspect the crossover harness for damage. Check the cable for cuts, kinks, or damaged connectors. A damaged crossover causes intermittent or complete failure. Inspeccione el arnés cruzado por daños. Revise el cable por cortes, dobleces o conectores dañados. Un arnés cruzado dañado causa fallas intermitentes o totales.
- Re-seat the crossover connection. Disconnect and firmly re-seat both ends. Twist the locking collar until it clicks. Vuelva a conectar el arnés cruzado. Desconecte y vuelva a conectar firmemente ambos extremos. Gire el collar de bloqueo hasta que haga clic.
Device won't turn on El dispositivo no enciende
- Check the crossover harness first. On CAT, Perkins, and Pellenc, the crossover harness is required for the device to receive power via the J1939 bus. Check this before anything else. Verifique el arnés cruzado primero. En CAT, Perkins y Pellenc, el arnés cruzado es necesario para que el dispositivo reciba energía por el bus J1939. Verifique esto antes que nada.
- Check the J1939 port connection. Ensure the J1939 connector is fully seated and the locking collar is secured. Verifique la conexión del puerto J1939. Asegúrese de que el conector J1939 esté completamente insertado y el collar de bloqueo asegurado.
- Check the vehicle is running. The J1939 port is only powered when the vehicle is running. Verifique que el vehículo esté encendido. El puerto J1939 solo tiene energía con el vehículo encendido.
- Hard reset / power cycle. Disconnect both the J1939 and crossover connectors, wait 30 seconds, and reconnect with the vehicle running. Reinicio forzado. Desconecte ambos conectores (J1939 y arnés cruzado), espere 30 segundos y vuelva a conectar con el vehículo encendido.
Vehicle has high idle or shows "always ON" El vehículo tiene ralentí alto o muestra "siempre encendido"
- Check the crossover harness connection. An improperly seated crossover can cause incorrect ignition data. Re-seat both ends and ensure the locking collars are fully twisted. Verifique la conexión del arnés cruzado. Un arnés cruzado mal conectado puede causar datos de encendido incorrectos. Vuelva a conectar ambos extremos y asegúrese de que los collares estén completamente girados.
- Check the J1939 data connection. Ensure the main J1939 connector is fully locked. A partial connection causes incorrect engine/ignition data. Verifique la conexión de datos J1939. Asegúrese de que el conector J1939 principal esté completamente bloqueado. Una conexión parcial causa datos de motor/encendido incorrectos.
🔵 GPS not connecting (Blue LED not solid) 🔵 GPS no conecta (LED azul no sólido)
- Check antenna orientation. The device must have a clear view of the sky. Mount on the exterior, not blocked by a metal roof or cab. Verifique la orientación de la antena. El dispositivo debe tener vista despejada del cielo. Monte en el exterior, sin bloqueo de techo metálico o cabina.
- Move outside the shop. Metal roofs block GPS. Drive at least 20 feet outside and wait up to 15 minutes. Salga del taller. Los techos metálicos bloquean el GPS. Conduzca al menos 6 metros afuera y espere hasta 15 minutos.
- Drive around the shop. Drive slowly around the shop or yard. Movement helps the GPS lock onto satellites faster. Allow up to 15 minutes. Conduzca alrededor del taller. Conduzca lentamente alrededor del taller. El movimiento ayuda al GPS a fijar satélites más rápido. Espere hasta 15 minutos.
🔴 Red LED blinking — firmware update pending 🔴 LED rojo parpadeando — actualización de firmware pendiente
- This is normal. A blinking red LED means the device is downloading the latest firmware. Expected on a first install or after a reset. Esto es normal. Un LED rojo parpadeando significa que el dispositivo está descargando el firmware más reciente. Es normal en una primera instalación o tras un reinicio.
- Wait for solid red. Once the firmware downloads, the red LED turns solid. This can take 5–15 minutes. Keep the device powered. Espere el LED rojo sólido. Cuando el firmware termina de descargarse, el LED rojo se vuelve sólido. Puede tardar 5–15 minutos. Mantenga el dispositivo encendido.
- Do not disconnect. Do not disconnect the J1939 or crossover harness while the red LED is blinking. Interrupting a firmware update can cause issues. No desconecte. No desconecte el J1939 ni el arnés cruzado mientras el LED rojo parpadea. Interrumpir una actualización de firmware puede causar problemas.